This post may contain affiliate links.
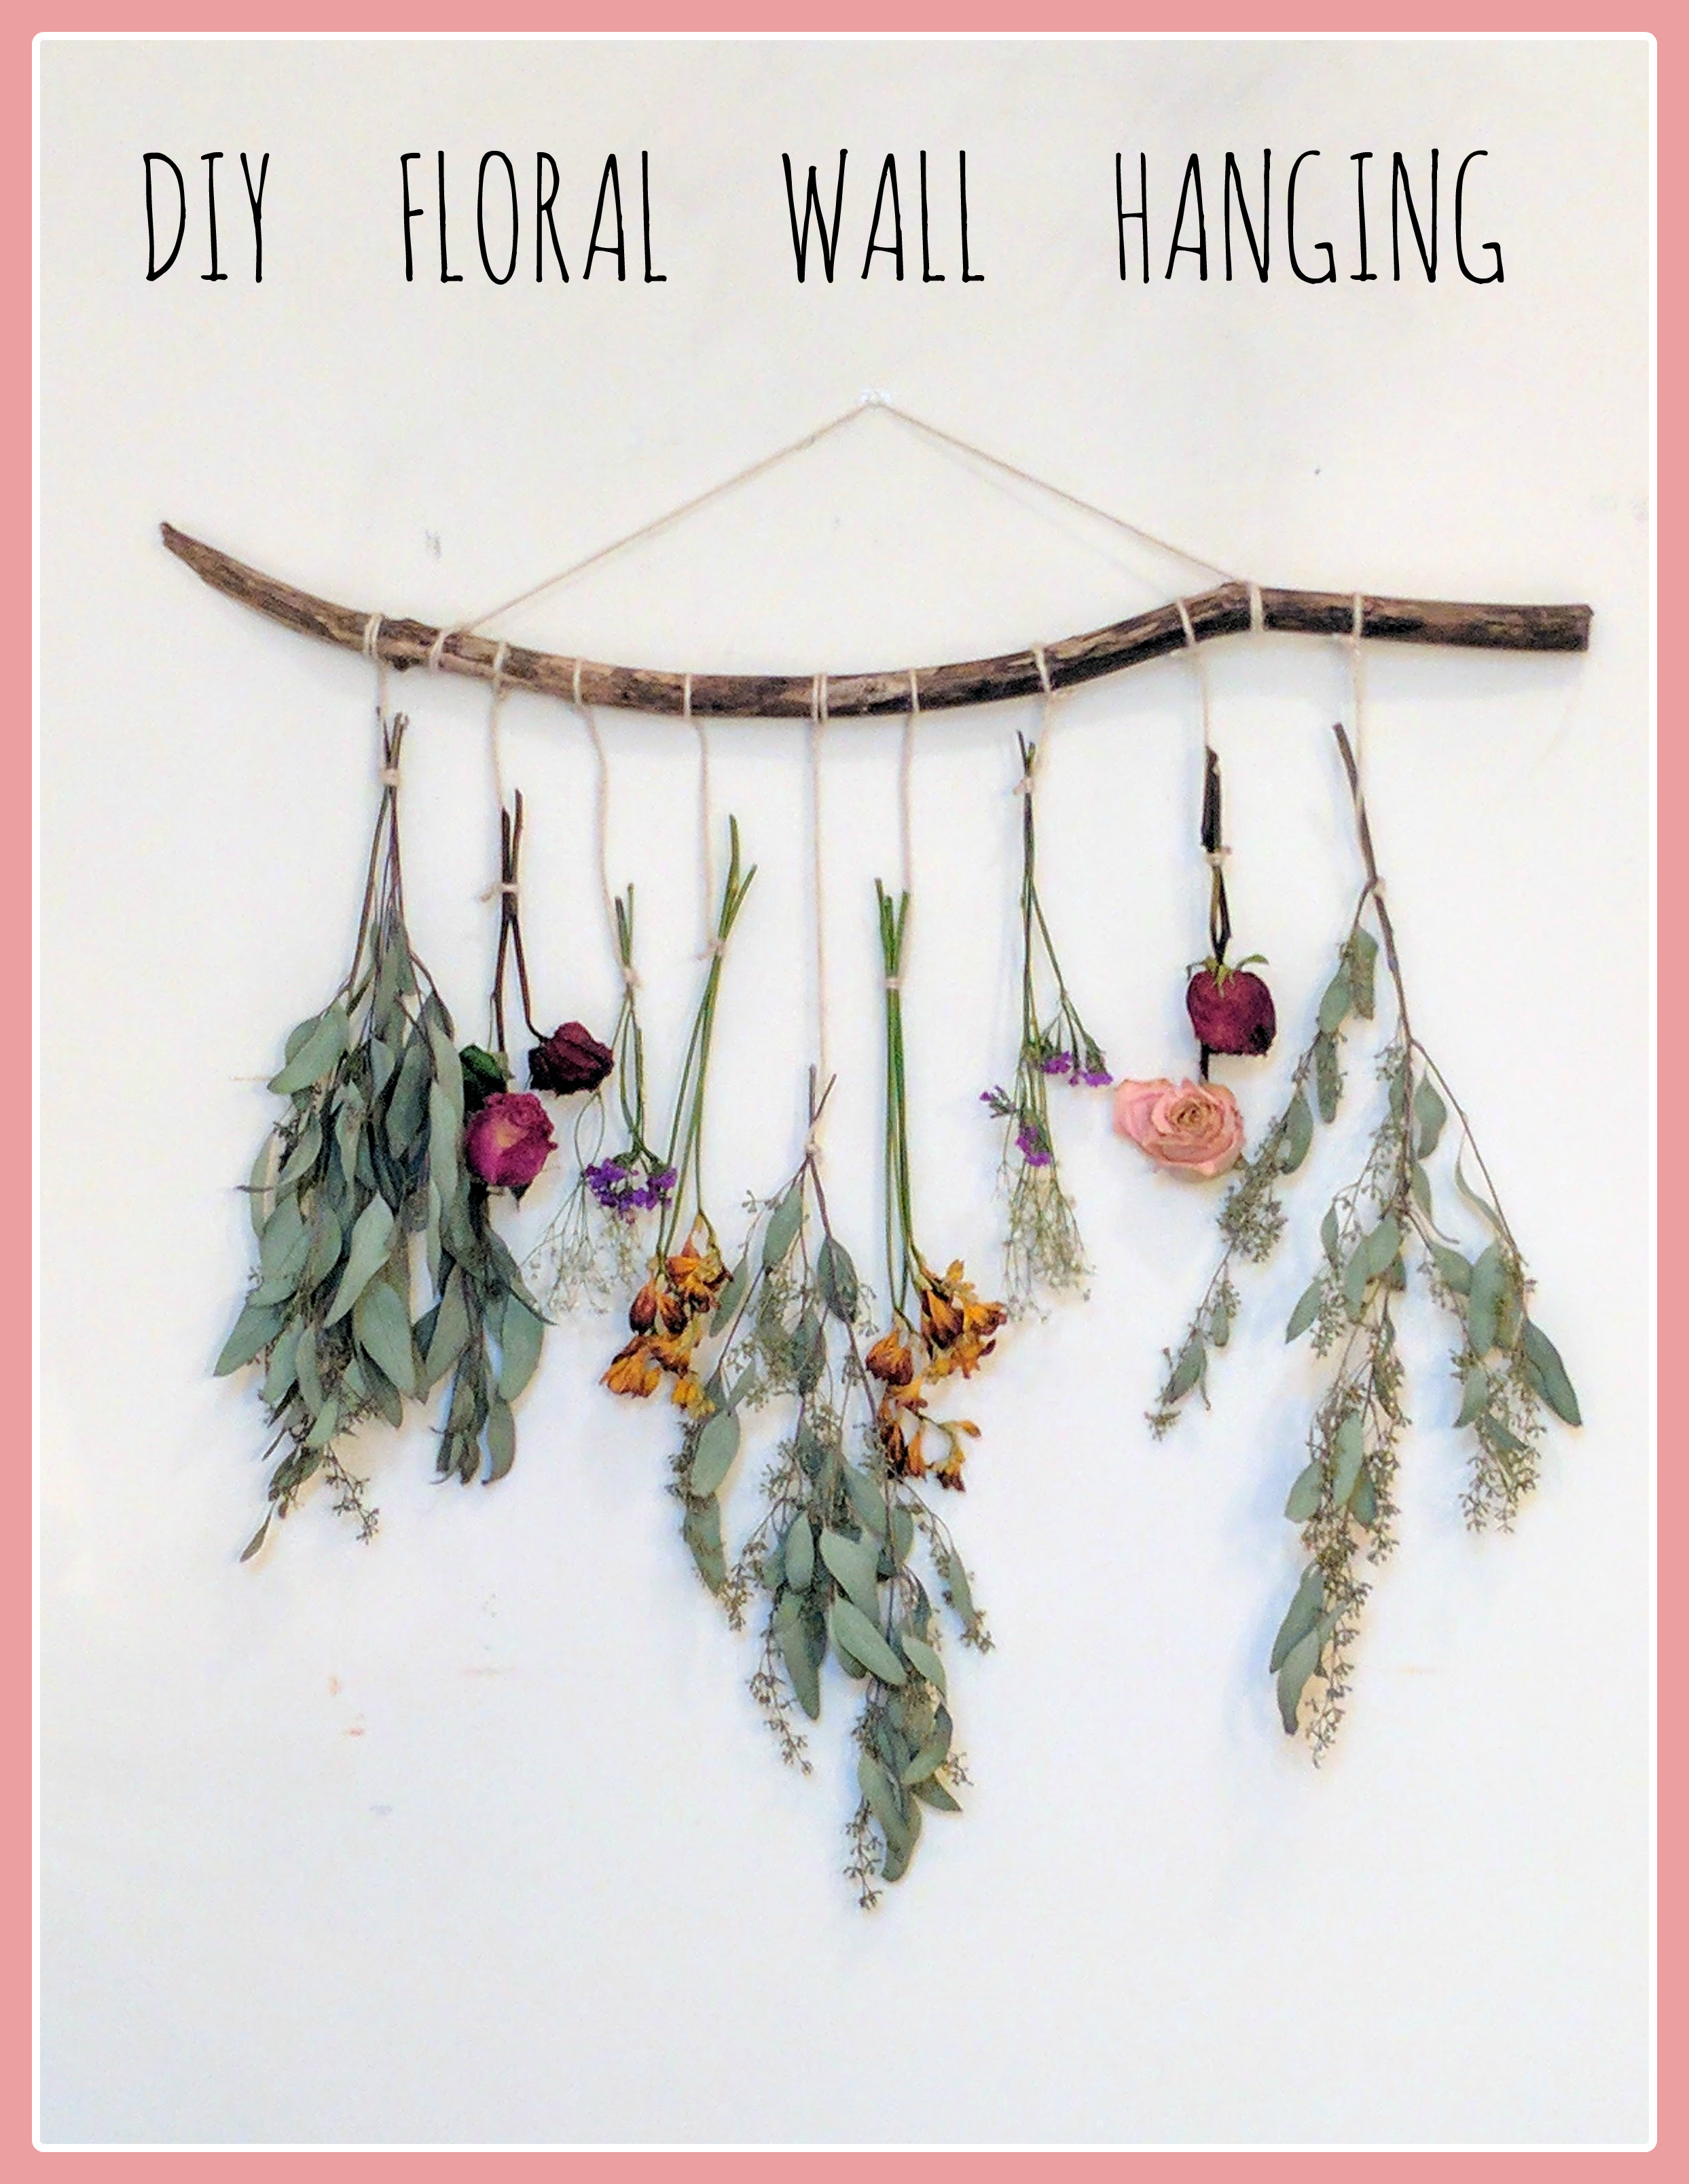
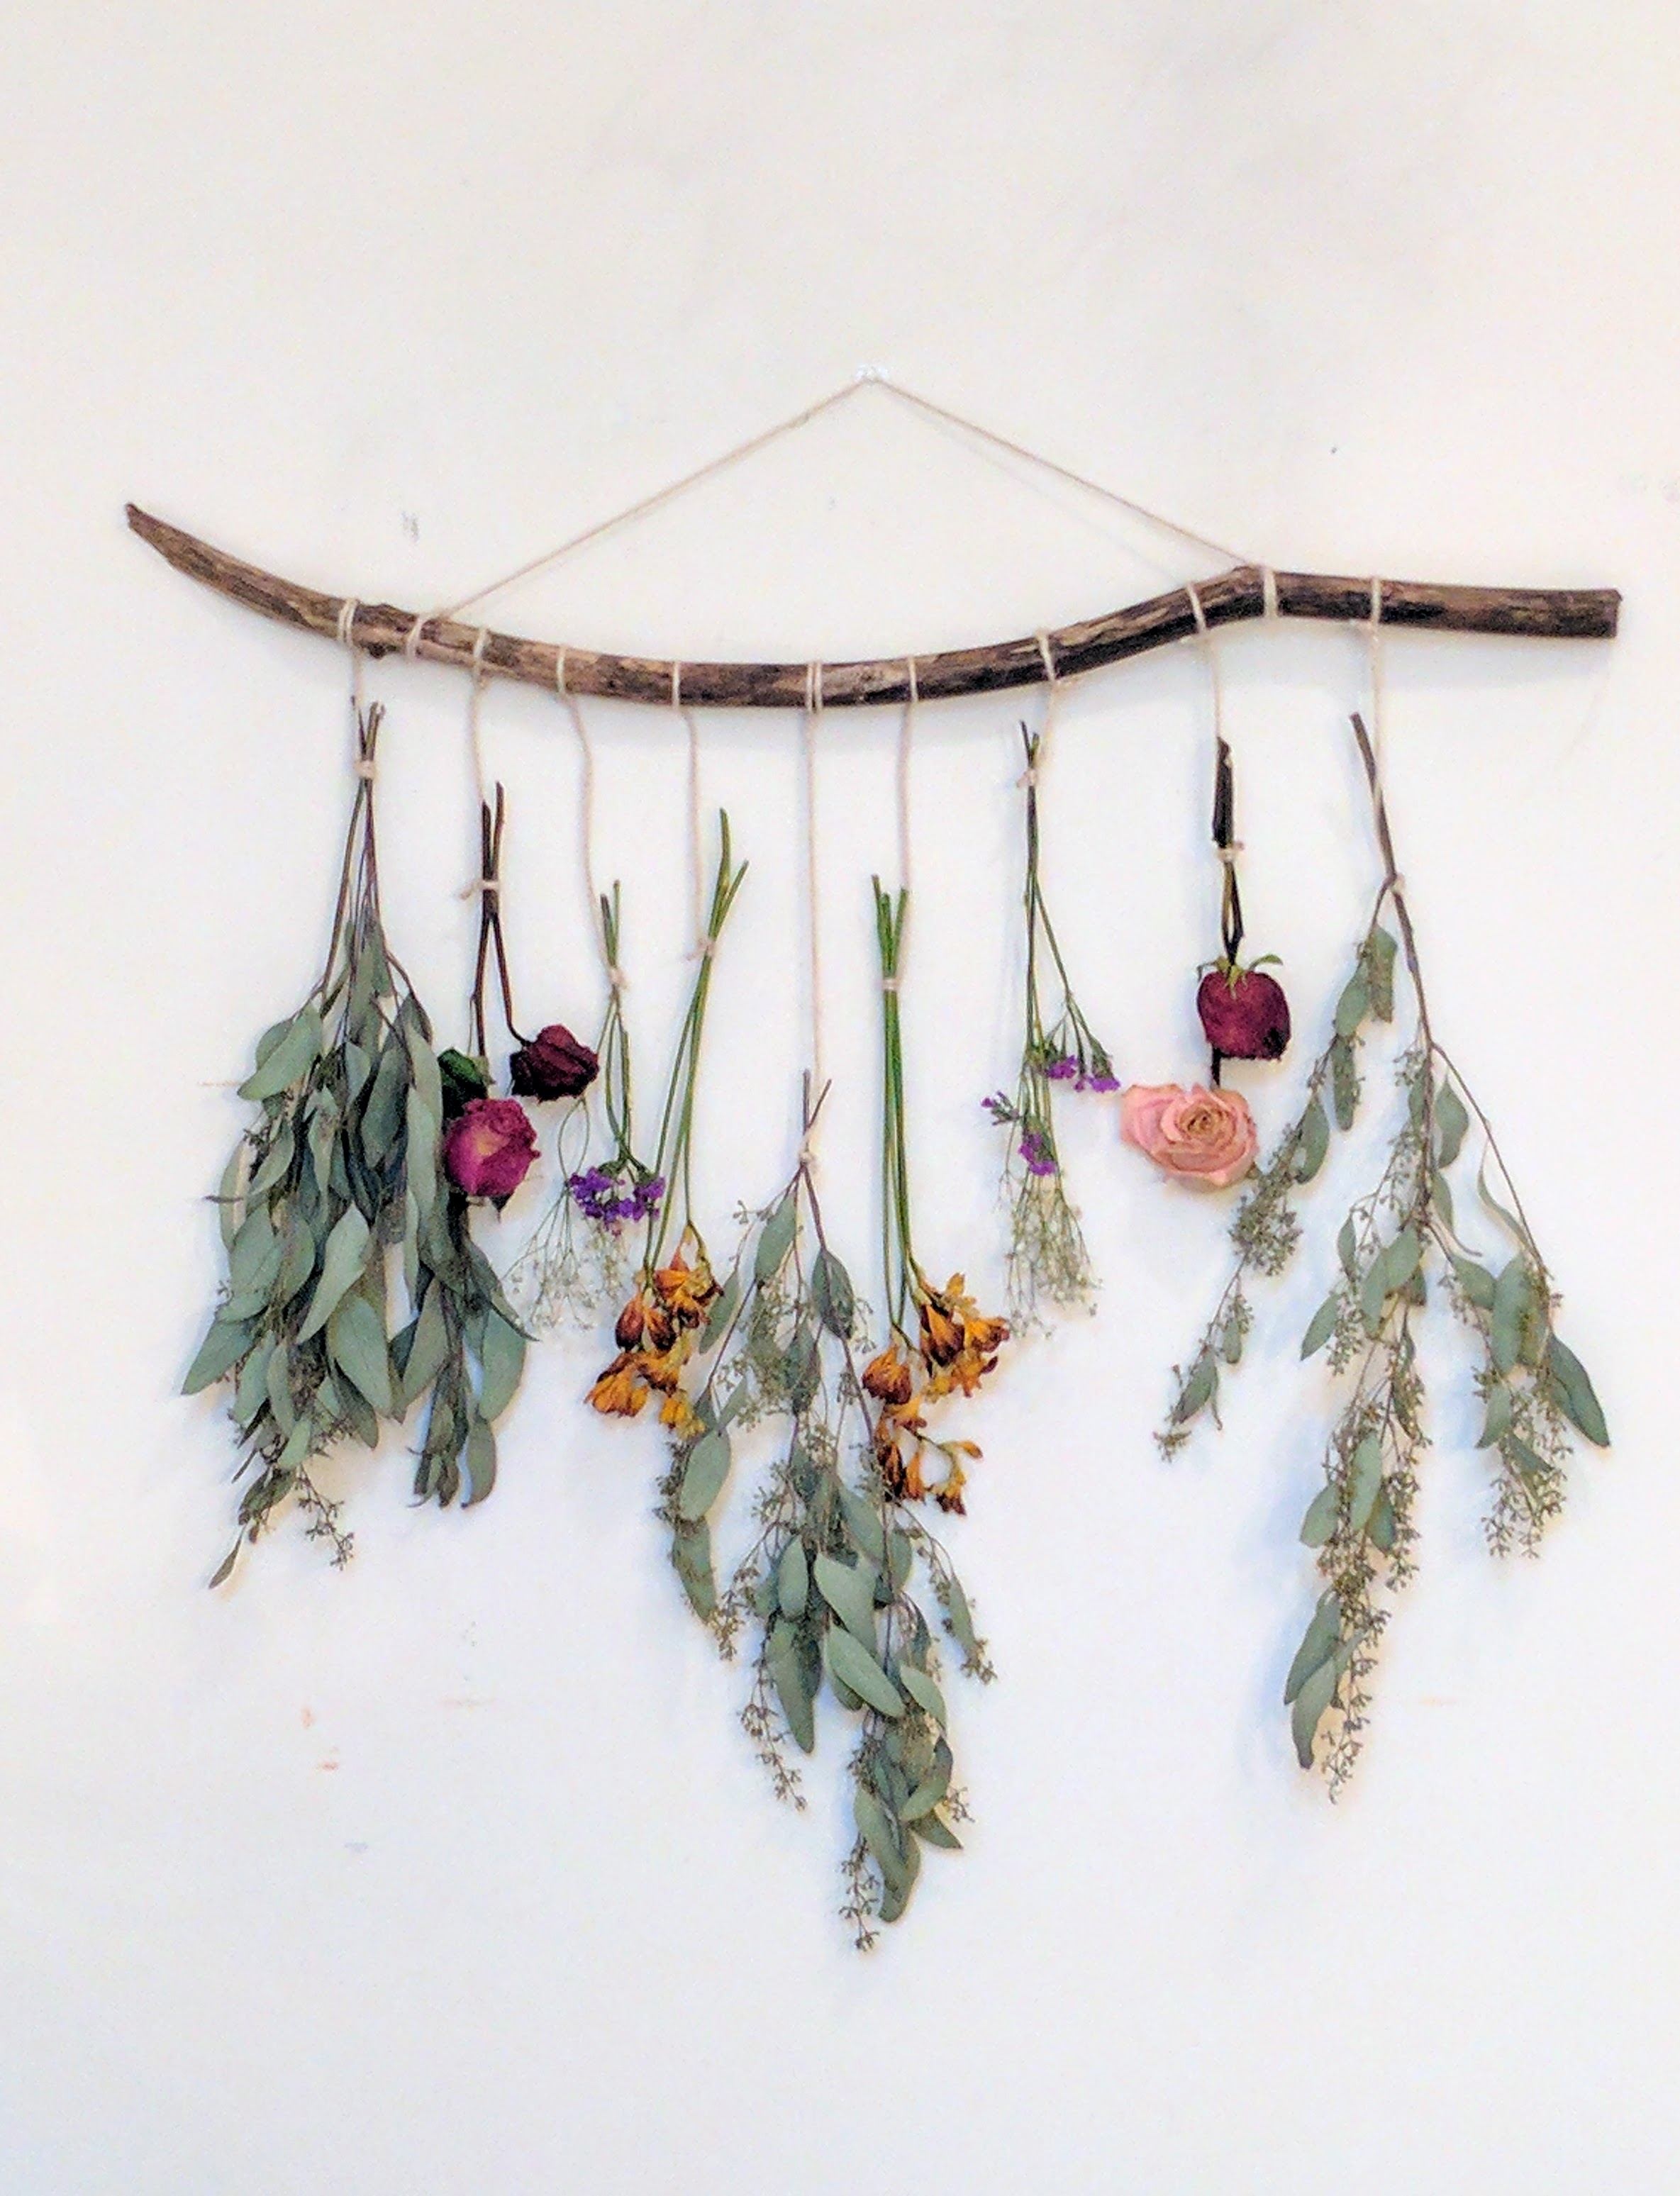
I don’t have a lot of family photos or movie posters hanging everywhere in my apartment, so I’m always looking for a way to add some beauty to my mostly bare walls. Recently I’d been toying with the idea of DIY wall hangings, especially woven ones, and was even contemplating a mass Christmas batch (with 2 sisters, a mother, and more than a few female cousins, identical yet slightly unique gifts have become a specialty of mine), when I came across a photo of flowers hung vertically to be used as a photo backdrop. That was it, I was inspired! A quick search showed me my options were endless, limited only by my imagination and the length of my branch. After looking around for a little bit, I decided that I wanted to create a dried floral wall hanging large enough to look like more than those 2 flowers I decided to string together, but small enough that it wouldn’t be overwhelming in my small space (and I didn’t want to drag a 5 foot long branch back to my walk-up apartment).
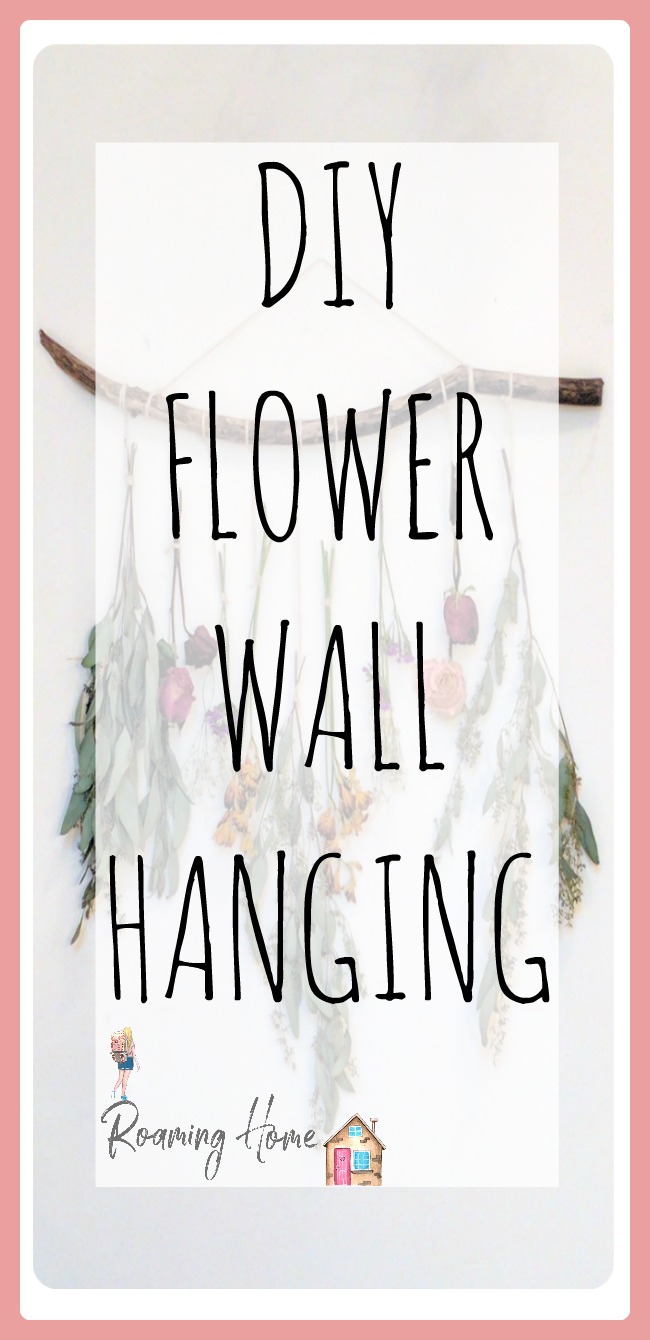
DIY DRIED FLORAL WALL HANGING
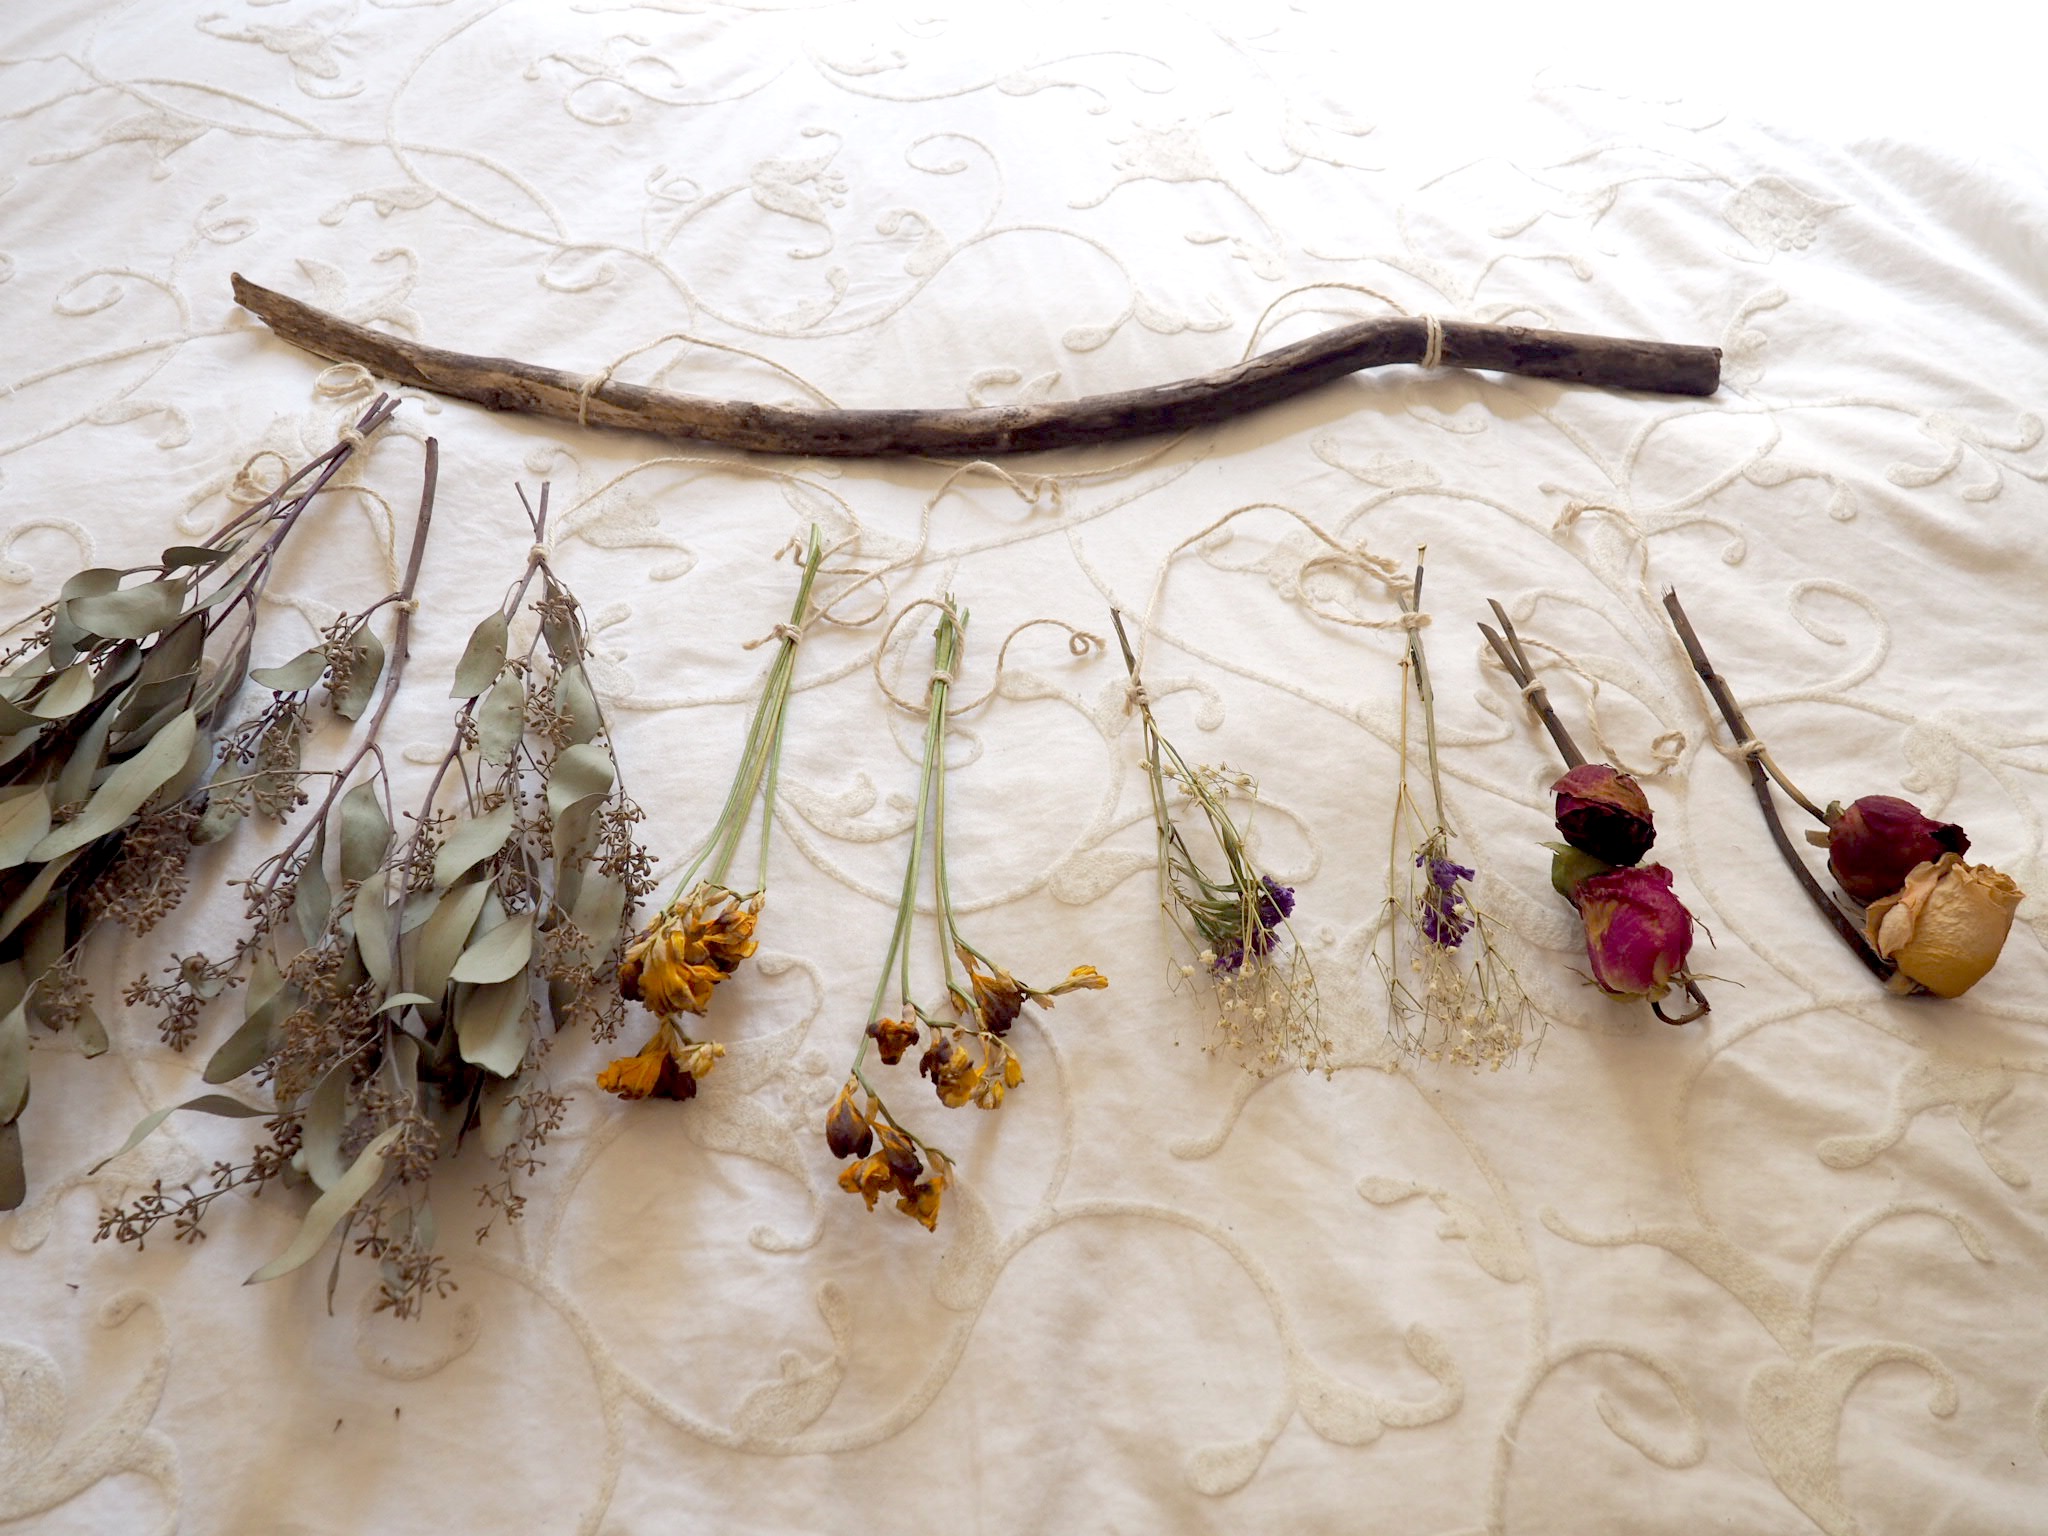
My first stop was Michaels, to buy some twine. While I was there I took a stroll through the flower section. Michaels does have some beautiful branches for sale, who knew?! If you don’t want to leave the couch, you can also order a branch on Amazon. This one is especially great- it already has the hanging string and hooks attached! Since I was not mentally prepared to pay $14 for a stick, and happened to be visiting my parents in Pennsylvania that weekend, I decided to wait until then and spent 5 minutes looking out back by our old maple tree. I grabbed a piece of sandpaper and sanded it down quickly to get the rough bark off, and carried that stick all the way back to New York. I’m glad Amtrak doesn’t have TSA level security! I’m sure the 2.5 foot long stick in my suitcase would have raised some questions! But even if you don’t have a park next to your window, the great thing about this project is that it can be done literally anywhere! All you need is a branch and some flowers. Both are easily bought if not right outside your door.
After the flowers were dried, it was a simple matter of arranging the bunches and stringing them up. It took a few tries to figure out how many to put together, and how I preferred the heights of the groupings, but I think it turned out pretty well! I went with a symmetrical, inverted V shape, but feel free to get as funky as you like with it! It makes me so happy to see flowers in my home, and since I don’t always remember to buy fresh ones, these do the trick more often than not!

