This post may contain affiliate links.

Welcome to Part 3 of my Contact Paper Kitchen Update! If you missed out on Parts 1 & 2, check them out- I’ll show you how I took my builder’s grade rental kitchen up a notch, with the help of removable Contact Paper. After completing the cabinets and the countertop, my backsplash looked a little bare so I once again turned to the internet for help. As far as removable options goes, backsplashes can get a little pricey. There are great mosaic tile stickers, but I absolutely love the look of subway tile, and thought that they would go really well with the “wood” countertop. There are permanent peel and stick options, and regular Contact Paper options, but I really liked the idea of this textured subway tile paper that I found at Target. It has a pearlescent sheen to it that’s really beautiful if you look closely (don’t worry, it doesn’t make your kitchen walls shine) and really does add a slightly raised texture that makes it look a bit better than regular Contact Paper. It runs about $35 a roll, but one was enough to do my entire backsplash, with some left over.

YOU’LL NEED: 

Starting


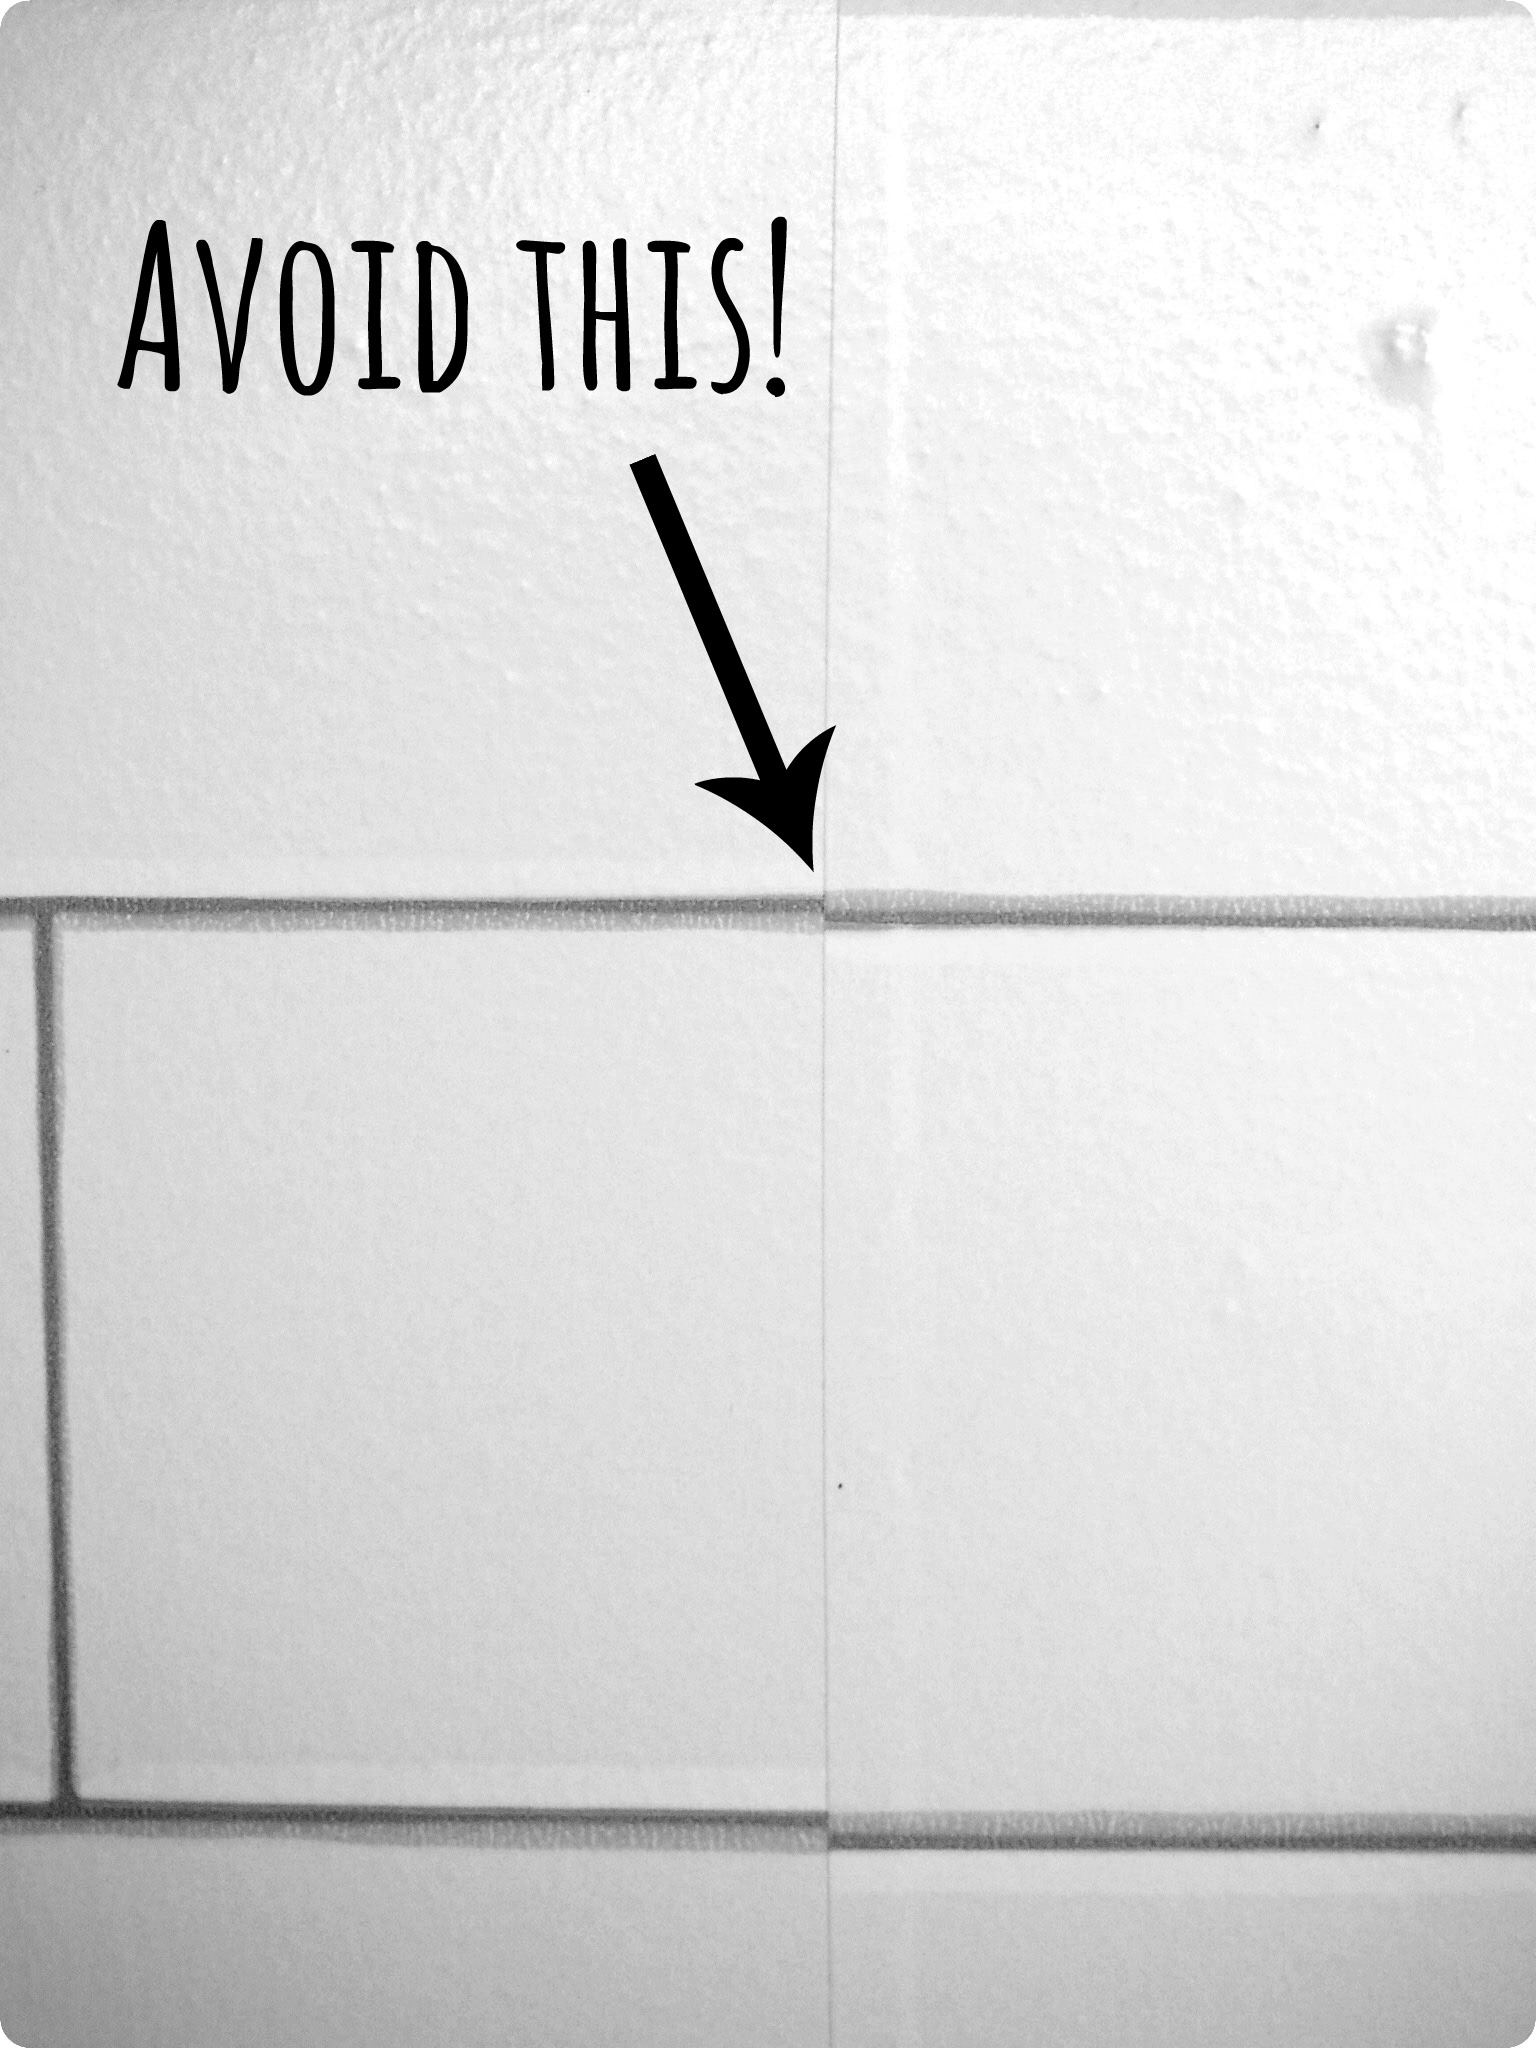
I started in the back corner along the longer wall, roughly cutting the vertical length and lining it up with the bottom of my top cabinets as well as I can. I used my hair dryer to provide some low heat and make the paper a little easter to use (see this video showing how to apply contact paper easily). There were more bubbles with this paper than with the black cabinet paper or wood grain countertop, but that may be because they were just more visible on the white paper. I’m sure applying the paper while vertical didn’t help either.

After I finished the first strip, I followed the same process down the line. The second strip required that I cut around the single outlet on my wall. I’m sure you can remove the cover, apply the paper on the inside, trim, and replace the cover easily- I just didn’t feel like doing it. I used the same process as I did with the kitchen sink, and trimmed very carefully with my utility knife. Since that was the only obstacle in my way, I continued my way down the line.

THINGS TO WATCH OUT FOR

NOTE! With this paper, THERE IS AN UPSIDE DOWN. It does not matter for your first strip, but once you decide, make sure you follow it the entire time. Because the paper is textured/ to add to the overall look there are two colors on the tile “grout” lines, a black and a grey, one on top of the other. Make sure you line up the colors with each other each time you start a new strip. This not only ensures that your paper remains level, but if you accidentally flip the strip everything will be off by a few fractions of an inch. It’s nothing your guests will be able to notice, but I do that on one or two of mine and had to redo it to save myself from the annoyance.

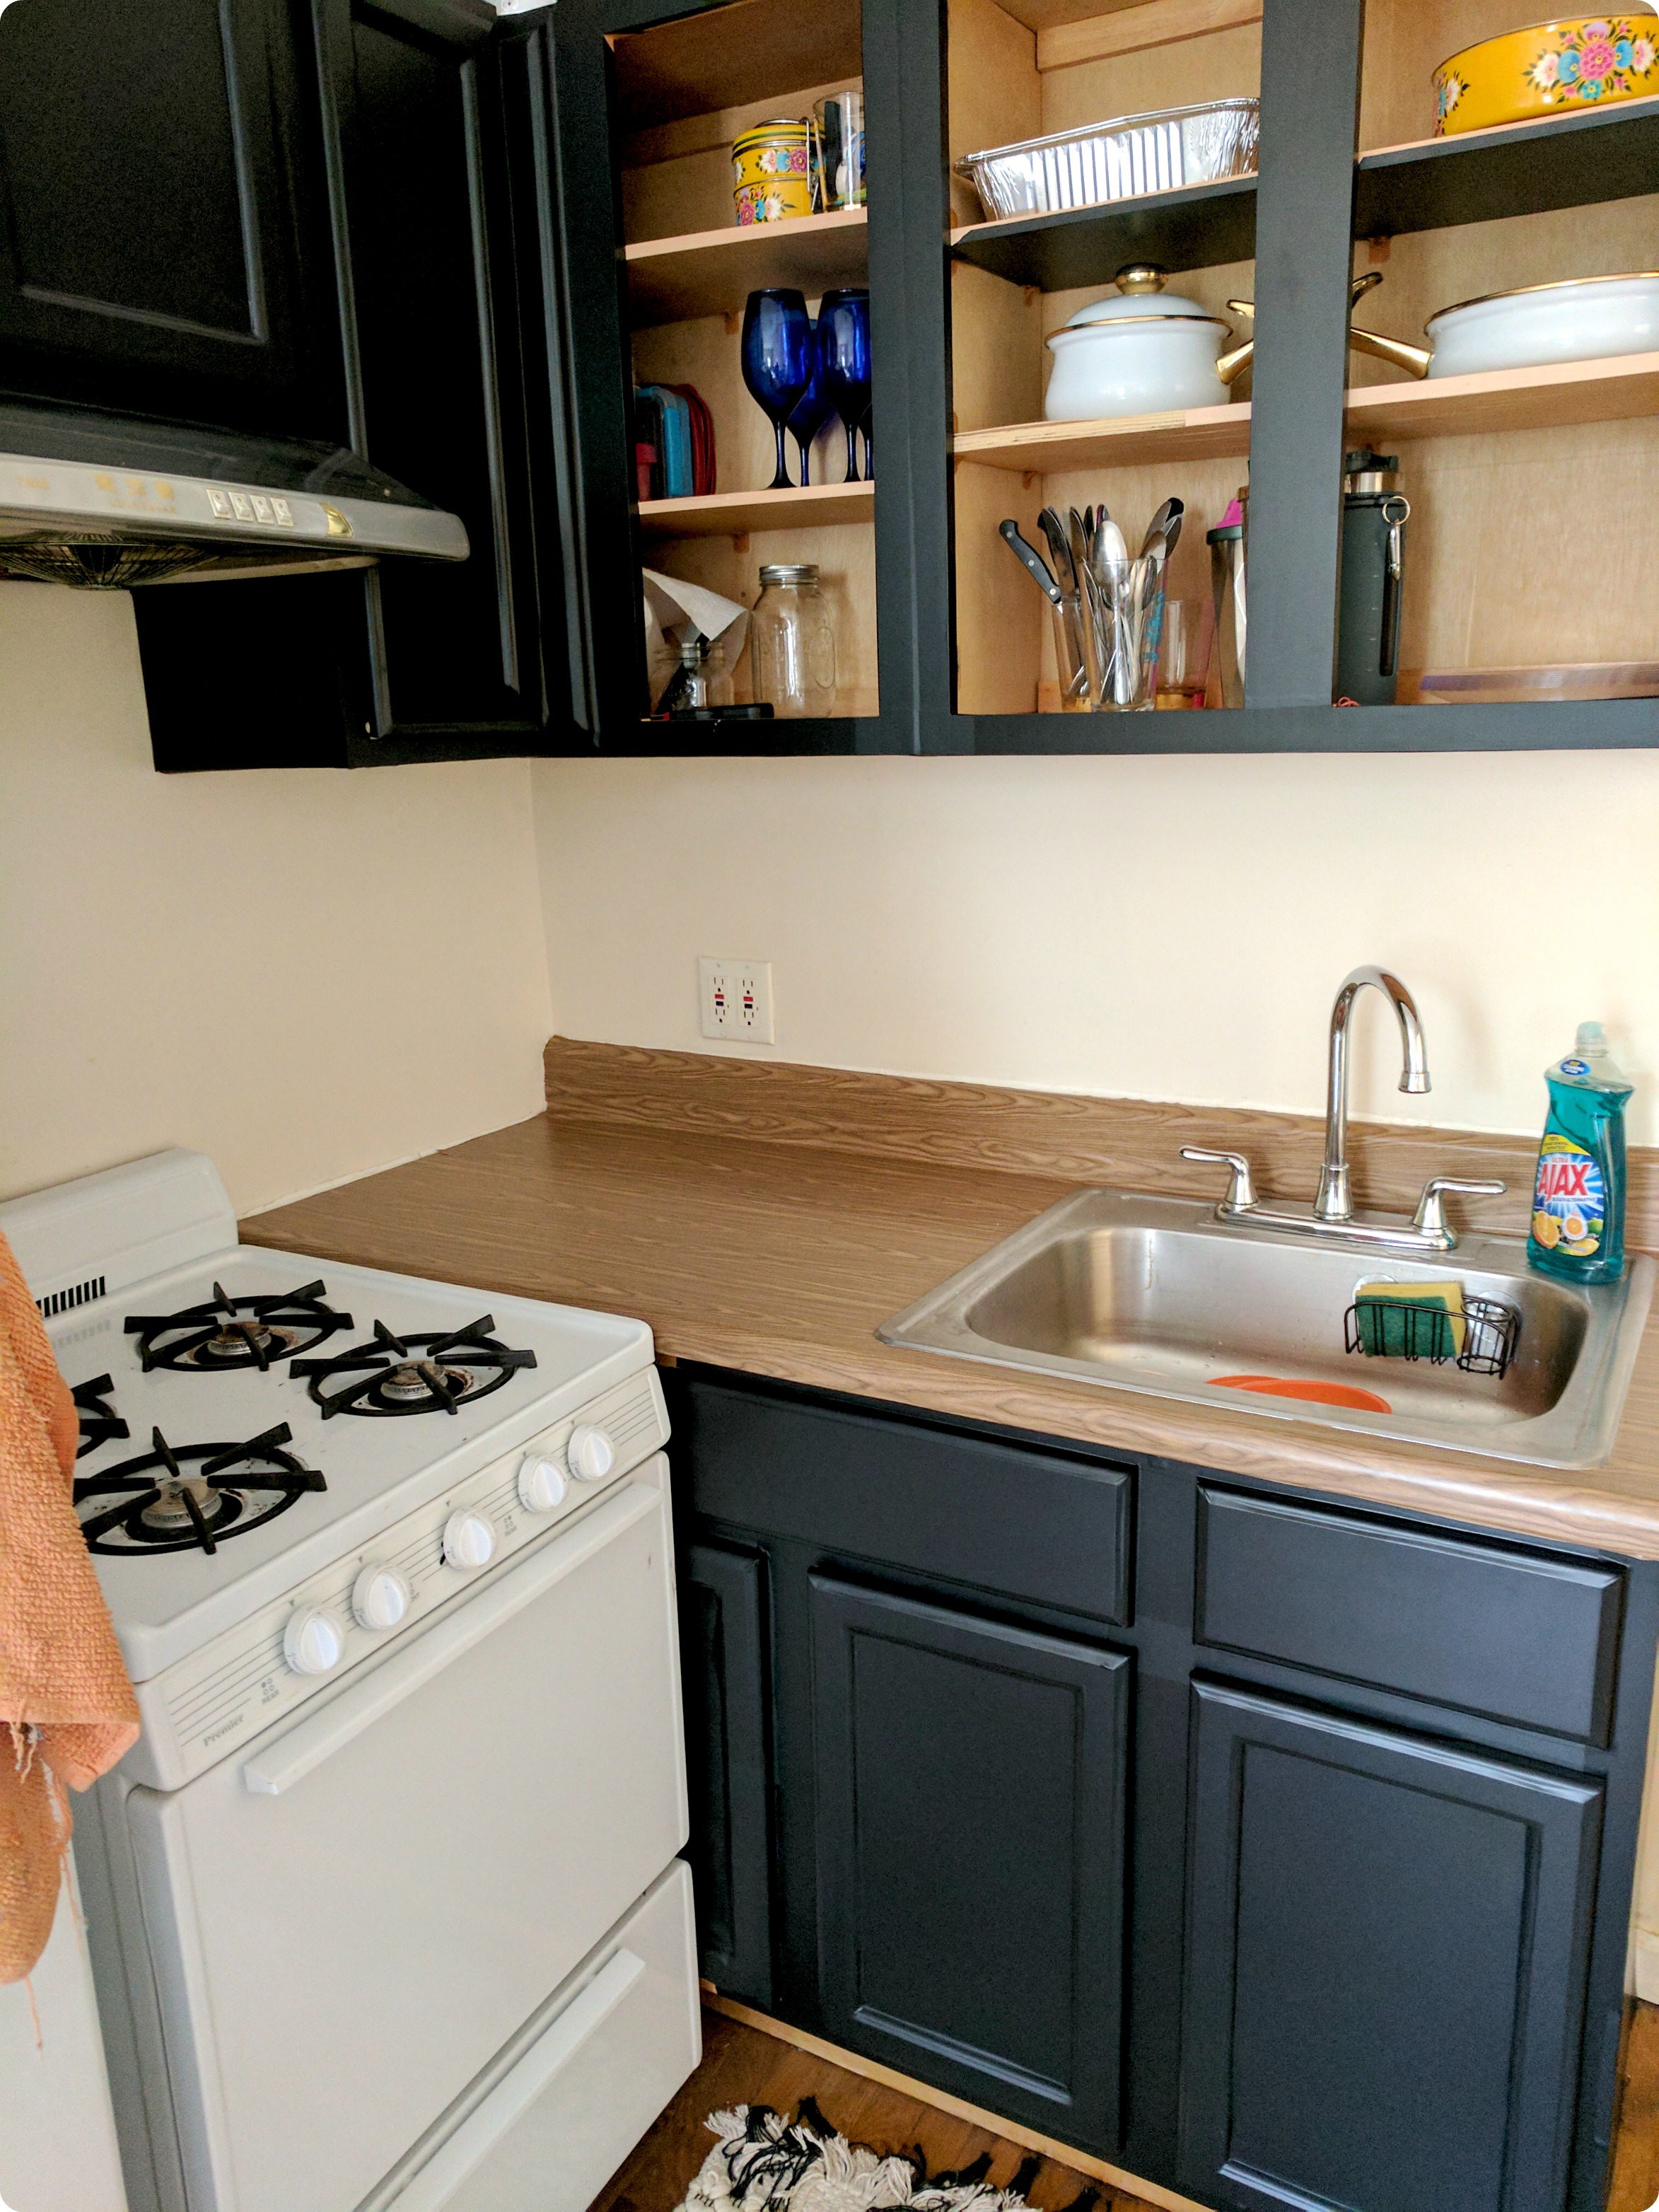
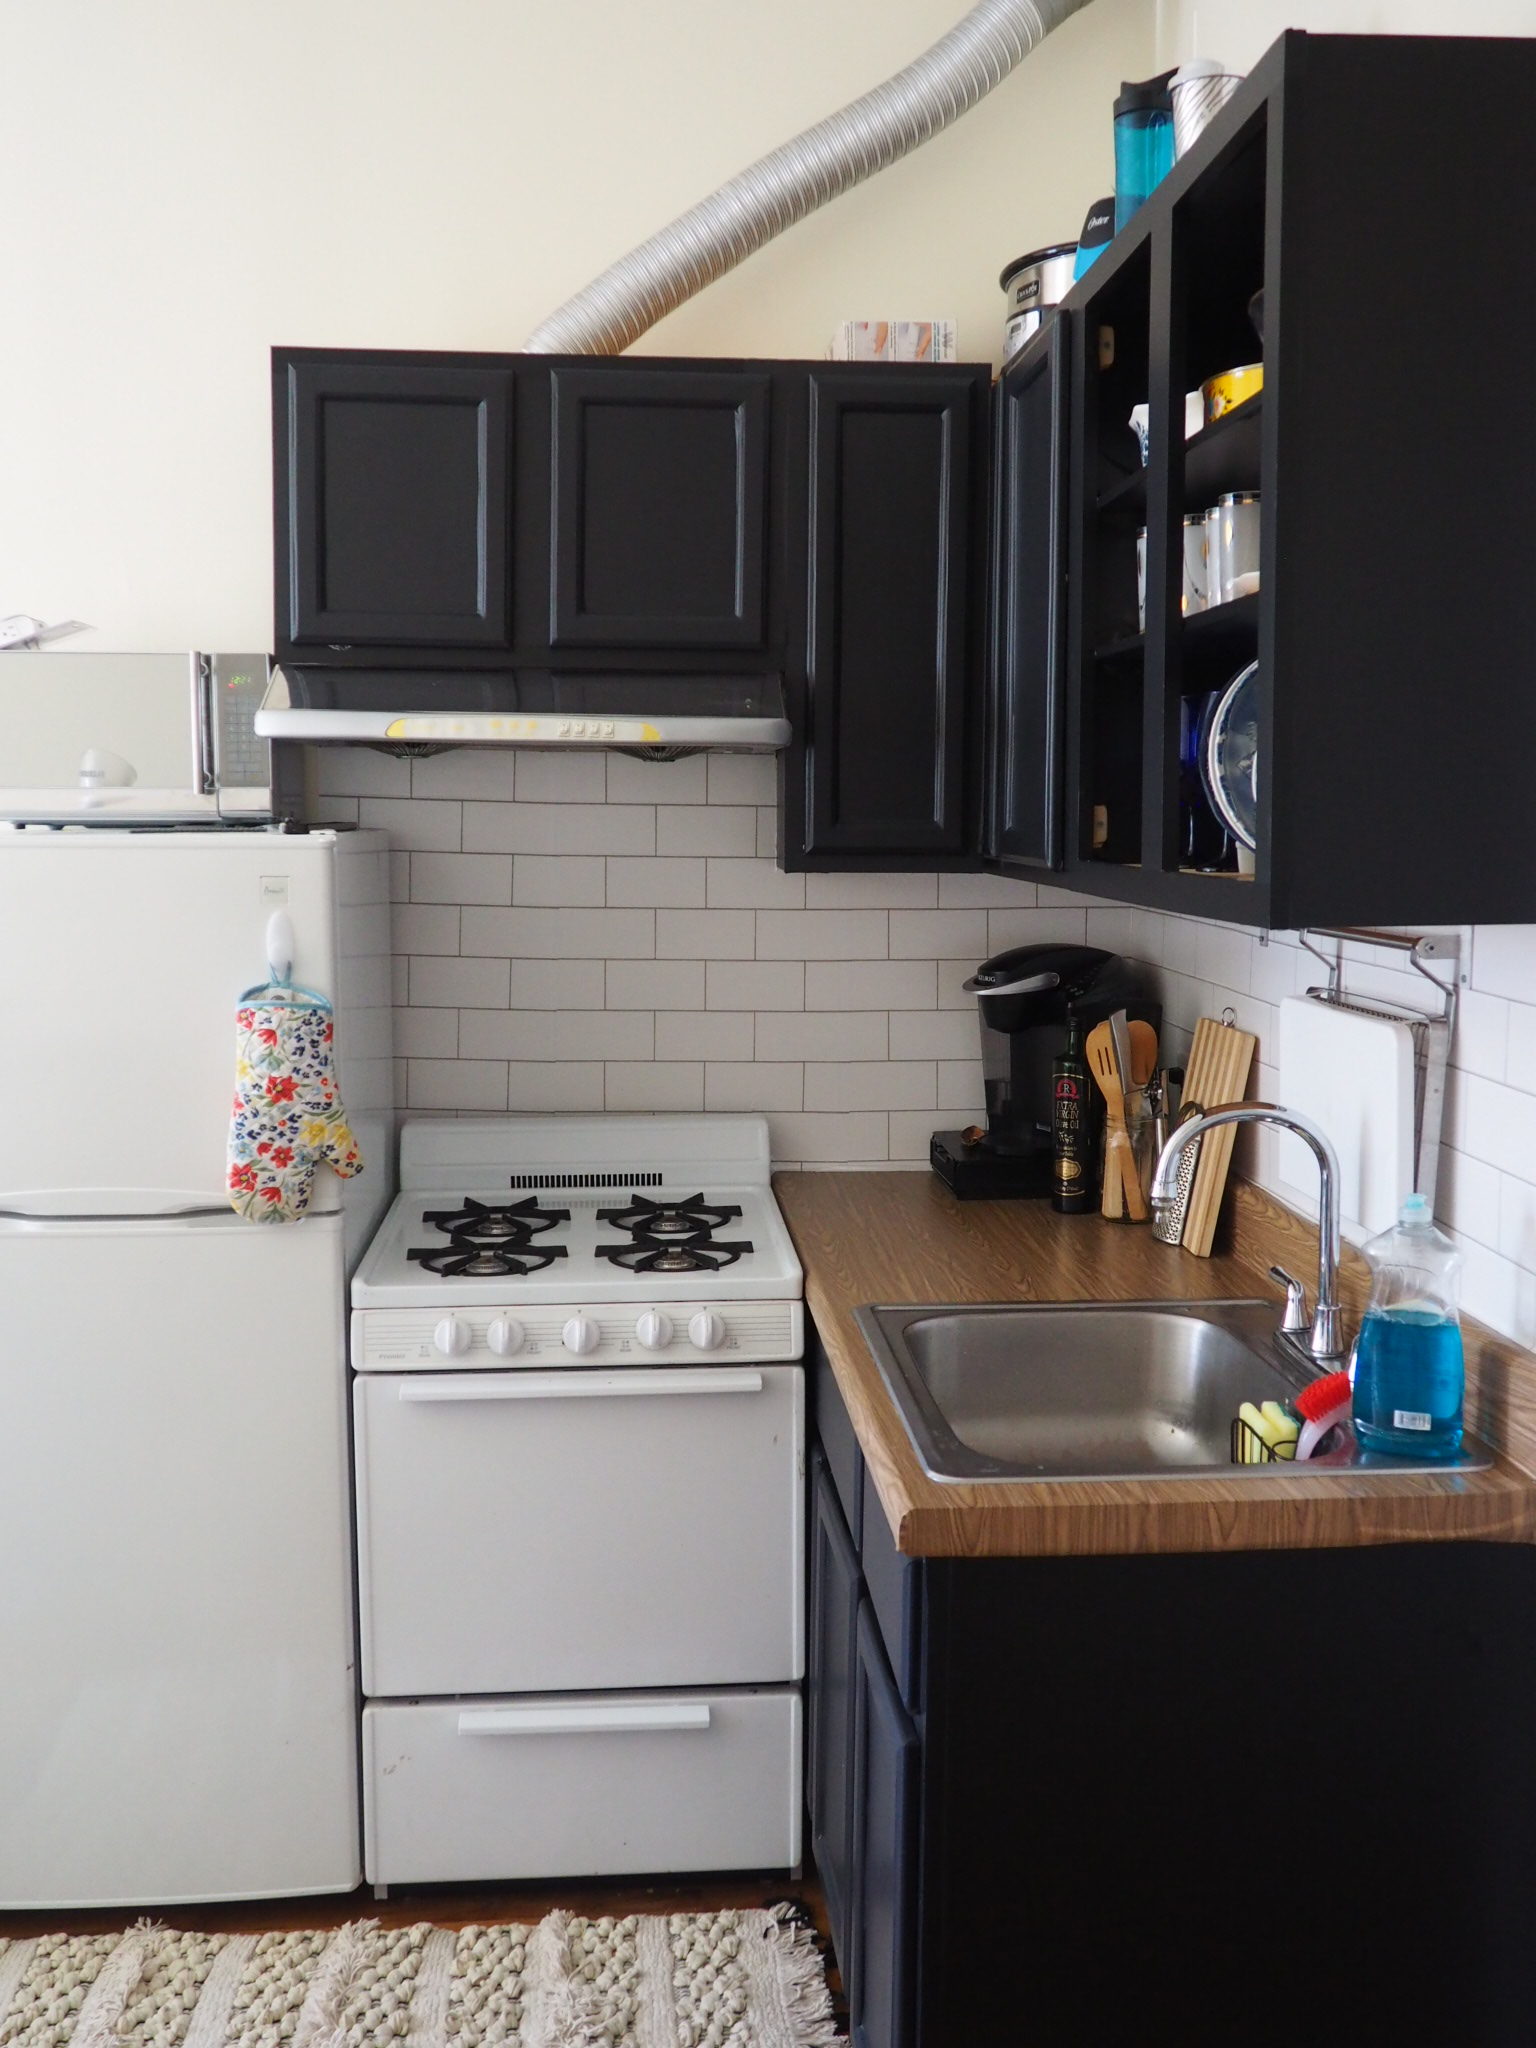
FINISHING THE BACKSPLASH

Eventually I got to the end of my cabinet/counter line, with about 3 inches of wall space left over before getting to the corner. I decided that for it to look normal I had to go all the way up the wall. So I started at the floor and lined up in the middle with the existing strip as I made my way up to the top of the cabinets. I trimmed off the corner with my utility knife like I did with the cabinets/ countertops, gliding along as close as possible, resting it along the wall without taking any paint off.
Once that wall was done I moved on to the one behind my stove, which I expected to be more of a challenge. I followed the same steps as I did on the long wall, but when my countertop ended as well as my top cabinets, I adjusted for height and kept moving along. The only difficult part was reaching over my stove to lay the paper. After a few frustrating tries, I worked it out. Truthfully, I didn’t really, the final strip is not as level as everything else. I’m not bothered by it- while I love a beautiful home, I’m not one to obsess over the small stuff. If I were looking for a more permanent fix or was really afraid that the people I’m entertaining would dig in on the imperfections I would probably redo it, but since neither of those are possibilities on my radar, I left it as is. I continued over to the fridge line, and was finished! Backsplash complete! I wipe down with a damp rag anytime any grease or food splatters, and it’s good as new.

so is this really “100% removable”?


When the time comes to move out of this apartment, all of this Contact Paper should peel right off. I would recommend using the hair dryer at that time as well though, as I’ve learned that it softens the adhesive. At worst, I’m planning on bringing up a few chips of paint with the backsplash paper, but it won’t be anything that a small paint brush and a $2 sample jar of paint can’t fix!

my total contact paper kitchen renovation investment


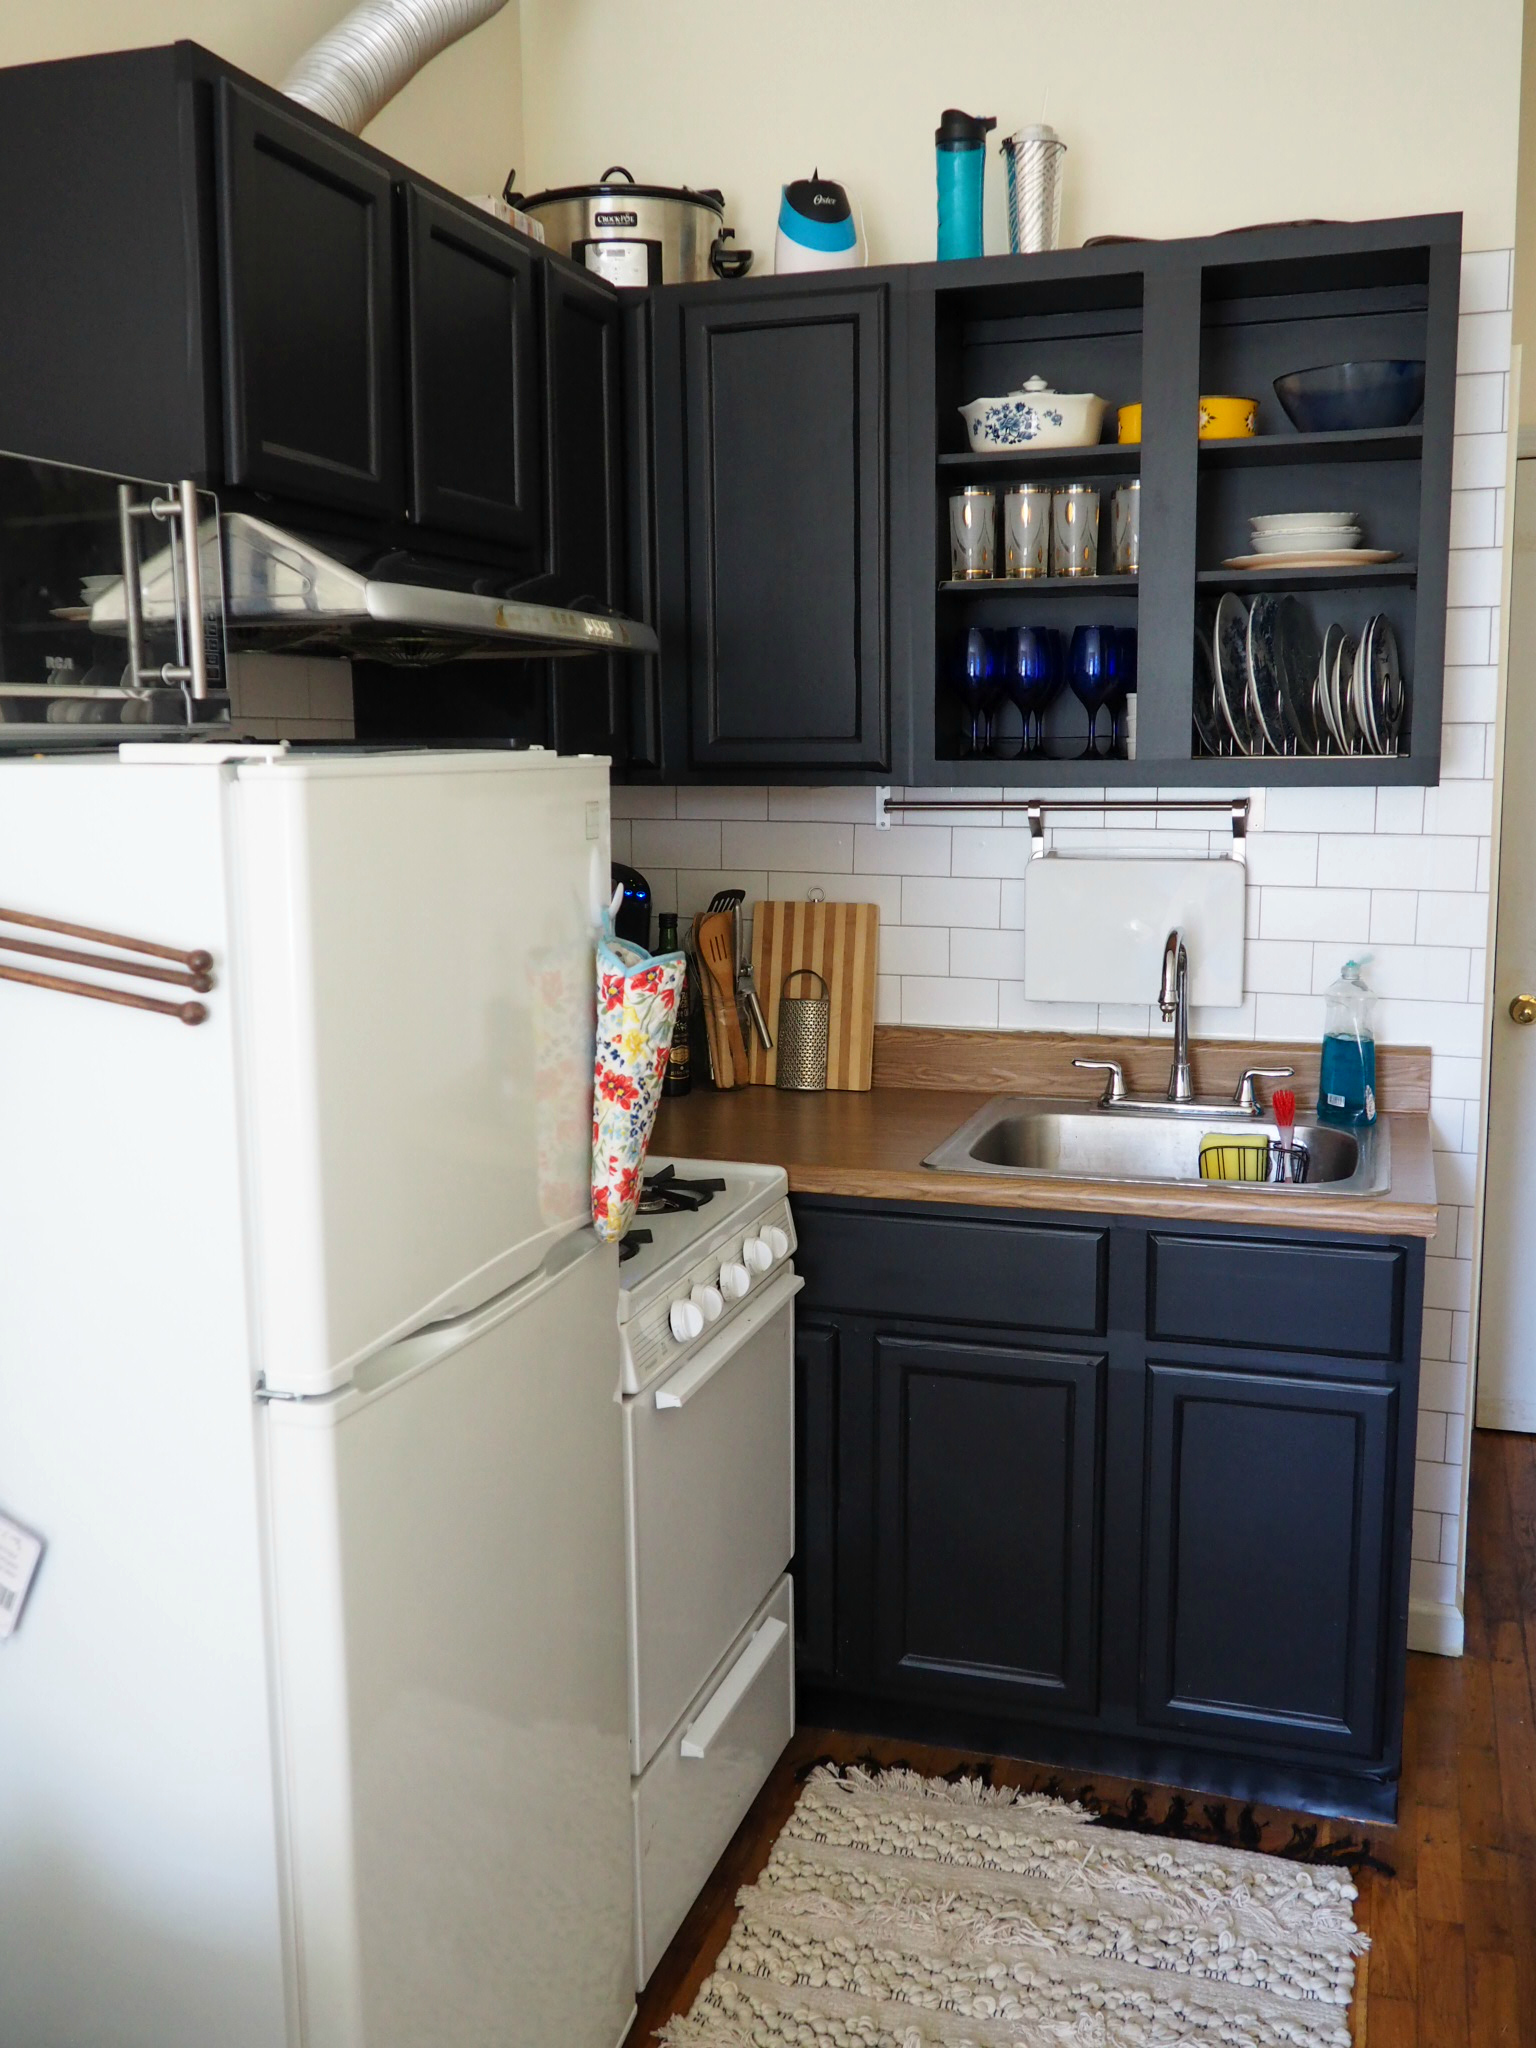
Overall this project cost me around $150 max, and I think the result speaks for itself. It’s not ideal or the classiest to have a kitchen completely covered in Contact Paper, but I think it sure as heck beats what I was given to work with, so I am very happy with how it turned out. At the end of my time in this apartment there will be nothing to repaint or repair, and I’m not putting money into tiling that I’ll never see back. If I get sick of it (or burn a hole in some section more likely) it’s a quick fix to replace or remove, and in the meantime it adds some sophistication to my tiny space!

Let me know what you think below, I’d love to hear thoughts and see how you’re “renovating” your rental space.

If you’re looking for Parts 1, 2, or 4 of this series, check them out!

Kitchen Update Part 1: Cabinets

Kitchen Update Part 2: Countertop

Kitchen Update Part 4: The Follow Up!